How To Do Ombre Nails
If you’re a beginner looking to dip your nails into the exciting realm of nail art, you’re in for a treat today. Today we are going to show you how to do ombre nails. A trendy and mesmerizing technique that’s perfect for adding a pop of color to your fingertips.
Ombre nails, also known as gradient nails, are all about blending two or more colors for a stunning, fading effect.
Don’t worry if you’re new to this. Below are some easy to follow steps and tips. So grab your favorite polish shades, a couple of basic tools, and let’s make some fabulous ombre nails together.
In this step-by-step guide, I’ll break down the process of getting beautiful ombre nails, from selecting the right colors to painting on the gradient transition.
How to do ombre nails
Supplies for ombre nails
Base Coat
Applying a base coat before the ombre process helps protect your natural nails and ensures a smoother application of the polish.
Top Coat
Seal in your beautiful ombre design with a clear top coat. This not only adds shine but also enhances the longevity of your nail art.
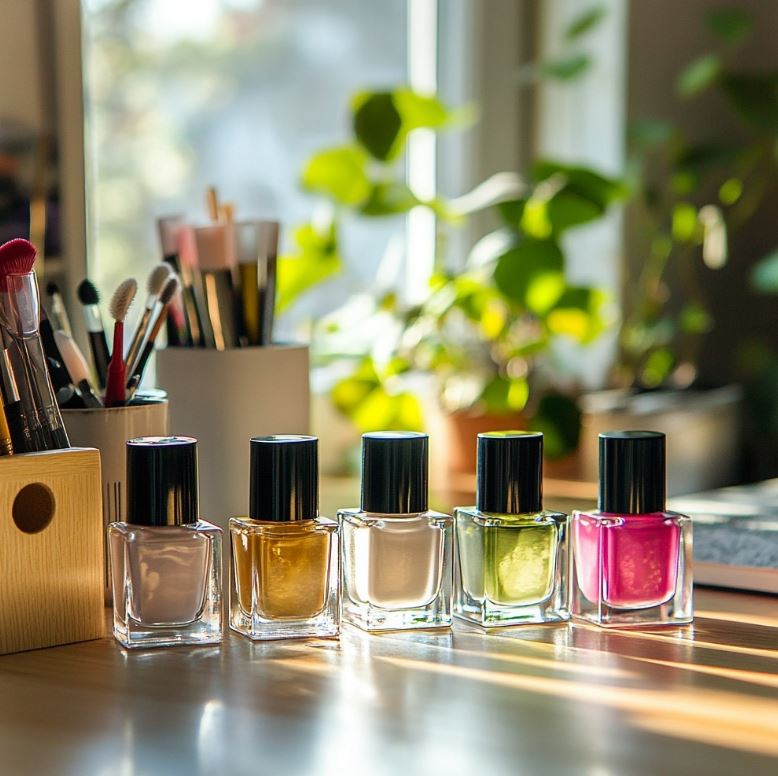
Nail Polish Colors
Choose two or more nail polish colors that complement each other and create a harmonious gradient. For beginners, it’s often easier to start with two shades that blend well and that are not too dark.
Here’s a list of nail polish colors.
Makeup Sponge
A small, disposable makeup sponge is the secret weapon for getting that seamless ombre effect. Cut it into a size that comfortably fits your nails.
Liquid Latex
To keep the polish off your skin and get a clean finish, use scotch tape or liquid latex to mask the areas around your nails.

Nail Polish Remover and Cleanup Brush
Mistakes happen, especially for beginners. Have nail polish remover and a cleanup brush handy to fix any smudges or excess polish.
Directions for ombre nails
Step 1: Prep your nails
Start with clean, dry nails. File and shape your nails to your liking. Apply a thin layer of base coat to protect your natural nails. Allow it to dry completely.
Step 2: Protect Your Skin
Using liquid latex, protect the skin around your nails. Apply it in a half-moon shape, leaving only your nails exposed.
Step 3: Paint Your Base Color
Choose the lighter color for the base. Apply two coats for full coverage, allowing each coat to dry completely.
Step 4: Apply Colors to the Sponge
Apply a strip of each chosen color directly onto the sponge, slightly overlapping them. Ensure the colors touch to allow for blending.
Step 5: Sponge Color onto Your Nails
Gently press the sponge onto your nail, starting from the tip and rolling it towards the cuticle. Repeat until you get the gradient effect. You may need to reapply polish to the sponge between nails.
Step 6: Clean Up Excess
Use a cleanup brush dipped in nail polish remover to tidy up any excess polish on your skin or cuticles.
Step 7: Repeat for Each Nail
Repeat steps 4-8 for each nail. Take your time and focus on creating a smooth transition between colors.
Step 8: Apply Top Coat
Once the ombre effect is dry, apply a clear top coat to seal and protect your design. This also adds a glossy finish to your nails.
Step 9: Final Cleanup
Remove the tape or liquid latex carefully. Use a cotton swab or Q-tip dipped in polish remover for any final cleanup around the edges.
Remember, practice makes perfect. Don’t be afraid to experiment with different color combinations and techniques until you find the ombre style that suits you best. Enjoy the creative process!

Ombre Nails FAQ
Selecting the right colors is crucial for a stunning ombre look.
Choose shades that complement each other well or belong to the same color family.
Experiment with light and dark tones, and consider using a color wheel for inspiration.
As a beginner, start with two colors until you become more comfortable with the technique.
Mistakes happen, but they’re easily fixable. Keep a small, angled cleanup brush or a cotton swab dipped in nail polish remover nearby.
Gently tidy up any smudges or excess polish around your nails, ensuring a clean and polished finish.
Yes, you can make ombre nails with virtually any nail polish. However, using polishes that have a similar formula and consistency can make the blending process easier. You can also do ombre nails with nail dipping powder.
Creamy and opaque polishes tend to work best for a seamless gradient effect. Gel polishes work especially good since they do not dry until they are under a UV lamp.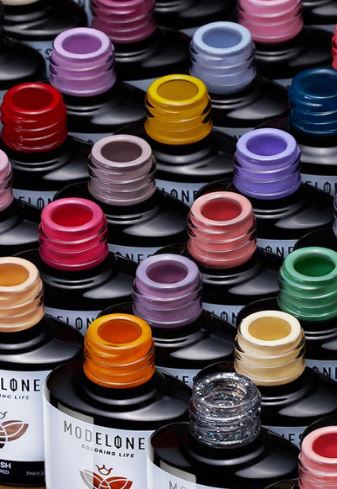
The drying time depends on factors like the number of coats applied and the thickness of the polish.
Generally, it takes about 15-30 minutes for the ombre design to dry completely unless you are using gels. To speed up the process, you can use a quick-dry top coat.
Be patient and avoid touching your nails until they are fully dry to prevent smudging.
Expert Tips for creating an ombre nail
1. Choose Colors Wisely
Opt for colors that blend well and create a harmonious gradient. As a beginner, start with two colors that are close on the color spectrum.
This makes it easier to get a seamless transition. Experiment with shades, and don’t be afraid to mix and match to discover your favorite combinations.
2. Blend Colors on the Sponge
When applying polish to the makeup sponge, ensure the colors slightly overlap. This helps in creating a smooth transition between shades.
You can practice on a piece of paper first to get a feel for how the colors blend together on the sponge before applying them to your nails.
3. Experiment with Techniques
Ombre nails offer endless possibilities, even on short nails. Experiment with different techniques, such as changing the starting point of the sponge application, using more or less polish, or incorporating additional colors for a unique look.
Don’t be afraid to get creative and make the ombre style your own.
Remember, practice makes perfect, so don’t be discouraged if your first attempt isn’t flawless. Each time you try, you’ll learn more about the technique and discover what works best for you. Enjoy the process and have fun creating stunning ombre nail art!
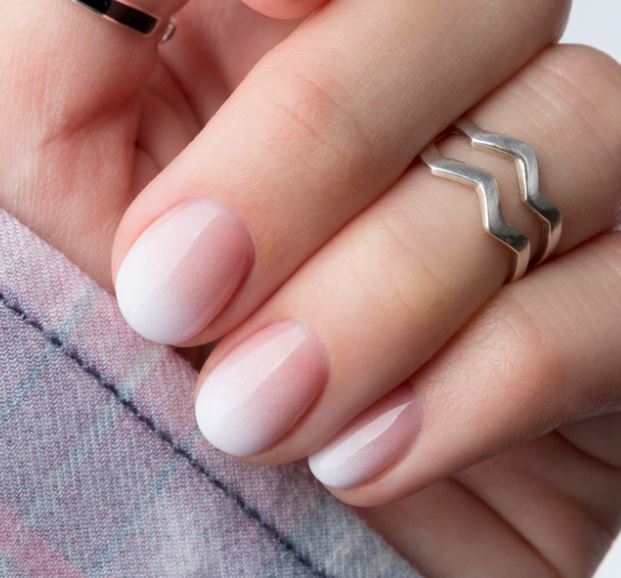
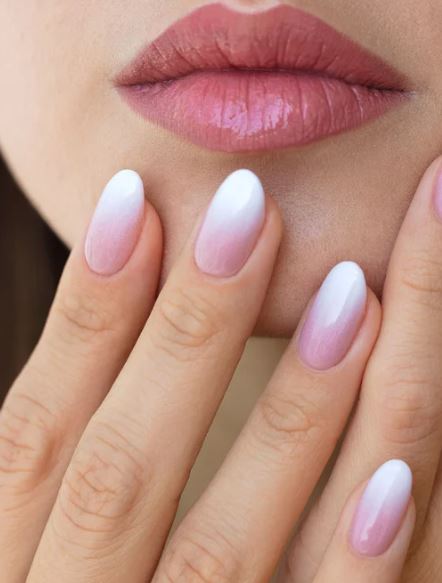
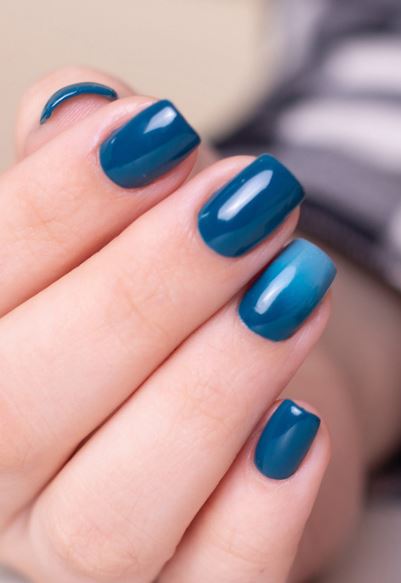
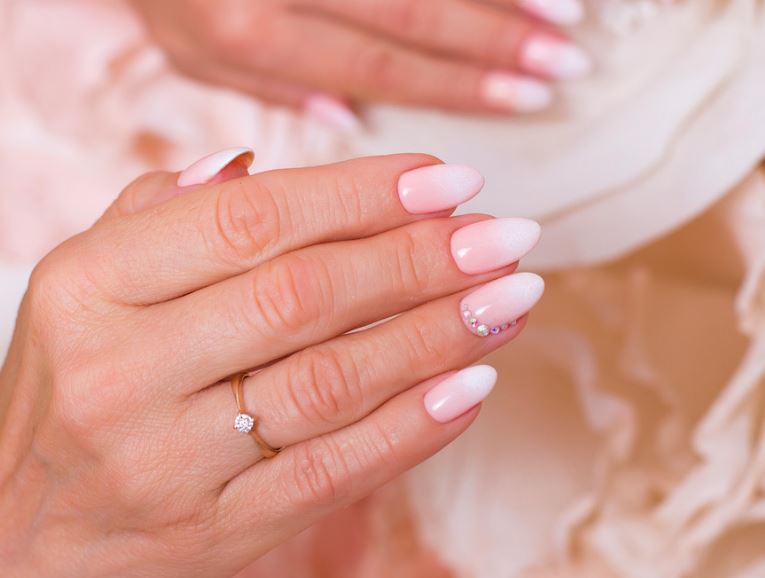
Ombre nail ideas to make
Here are some ombre nail art ideas to try for some inspiration. Let these ideas inspire your next stunning nail look, adding color and style effortlessly to your fingertips.

Thanks for exploring these ombre nail ideas! I hope you found inspiration for your next fabulous nail look.
Don’t hesitate to share your nail art journey with me – let me know how your nails turn out and feel free to share any tips or tricks you discover along the way. Happy nail painting!
More nail art fun!
![15 Best Salon Storage Cabinets [2026]](https://rasberirose.com/wp-content/uploads/2024/12/salon-storage-cabinets-cover.jpg)