Unicorn Nail Art Idea Tutorial With Gel Polish
Here is the best and easy to follow DIY unicorn nails tutorial with step by step instructions. In this nail art tutorial you will learn how to do unicorn nails. Today we are partnering up with SugarFieldDIY to show you how to do these nails.
Do you love unicorns? We sure do! They are so magical and whimsical, and they always make unicorn nails so enchanting. And what’s not to love about their rainbow manes and sparkly hooves?
So why not bring some unicorn magic into your nails with this easy DIY tutorial with some nail art stickers and gel polish?
Before you know it you’ll have the most envy-inspiring nails around! Read on to learn how to create these fabulous unicorn nails for yourself. Everyone will be asking where you got them done. This unicorn nail art is easy!
These unicorn nails are made with some supplies we got in from Etsy, we purchased some supplies to make our own unicorn nail art kit. The links are at the bottom of this tutorial.
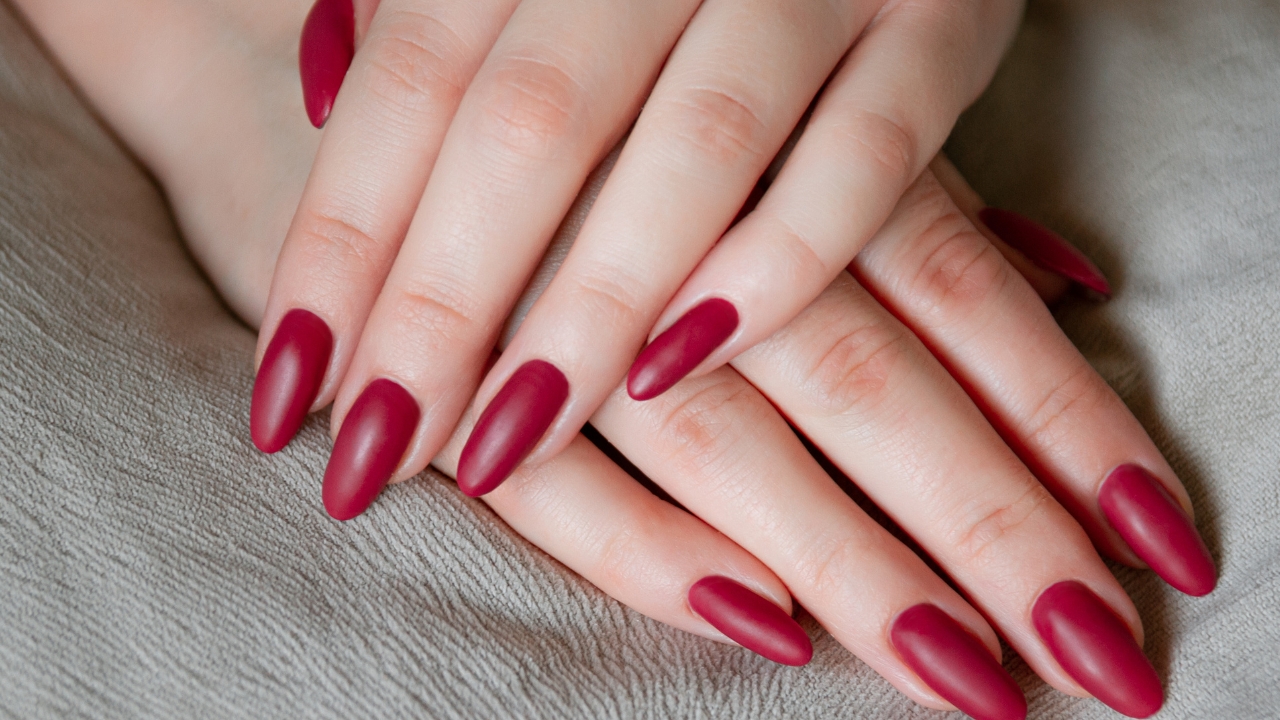
This unicorn nail manicure tutorial is done on nail tips. Or you can do this unicorn design on your natural nail too. This looks great for short unicorn nails also.
Unicorn Nails Tutorial
Instructions: DIY unicorn nail art idea
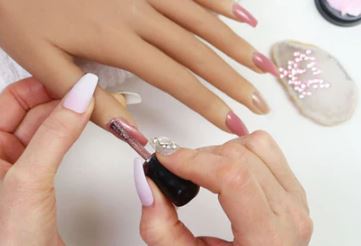
Step 1:
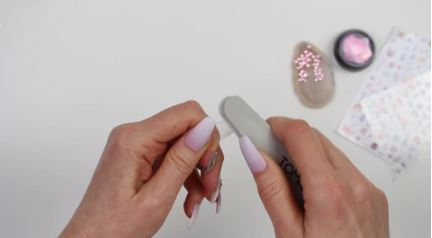
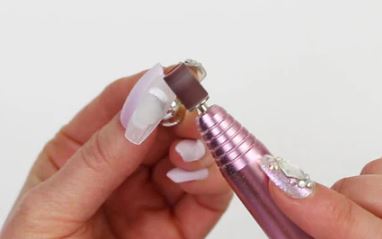
Using your file, gently buff the nail tips to get rid of the shine. This is an important step or the gel base coat will chip off easily. If you do not have a nail drill, you can use a nail file with about 180 grit.
Tips can be a bit thin on the edges so just be sure you are doing this step carefully so that you do not damage the tip of the nail.
*If you are doing this unicorn design on your natural nail, use a nail file (not an e drill) to gently buff off the shine.
Step 2:
Wipe off all of the nail dust with a brush and then go over the nail tips with an alcohol wipe. Make sure that there is no dust or debris on the nails so that the application of the base coat will be smooth.
Step 3:
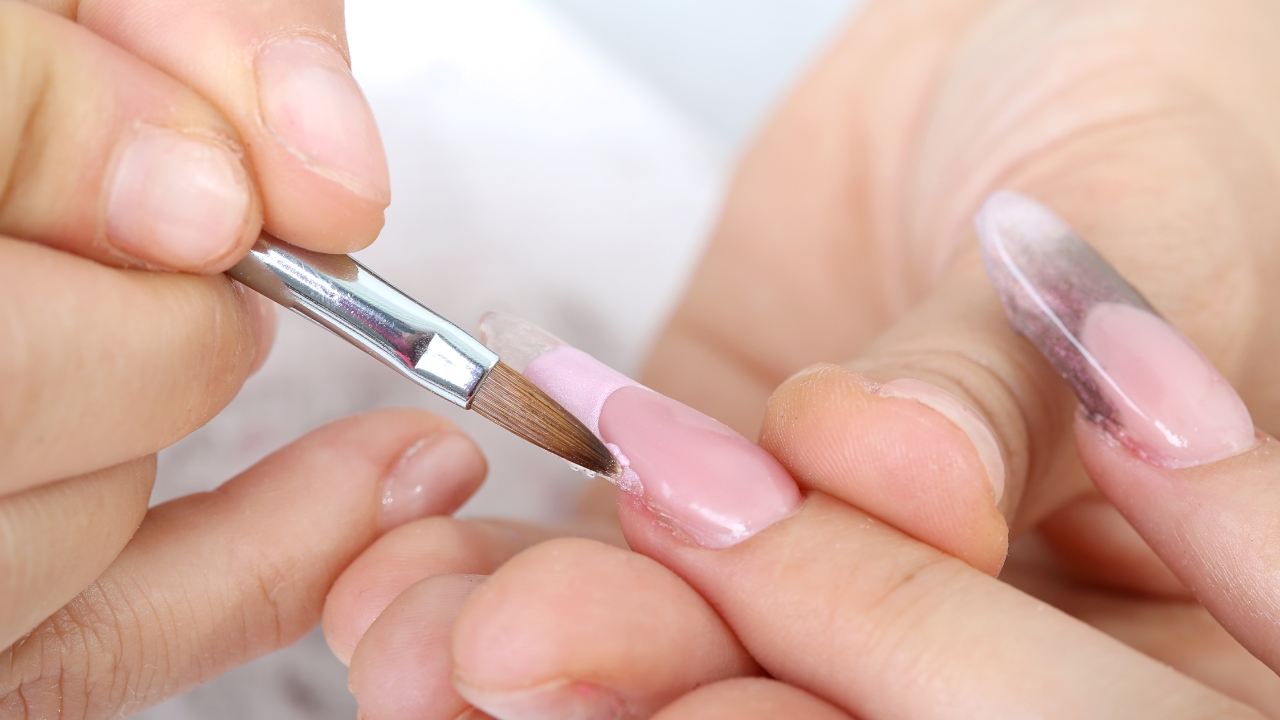
Apply a base coat to all of the nail and cure under a gel lamp. Cure times will be based on the base that you are using. Follow the cure instructions suggested by your gel polish brand. If you do not have gel polish, you can use regular nail polish.
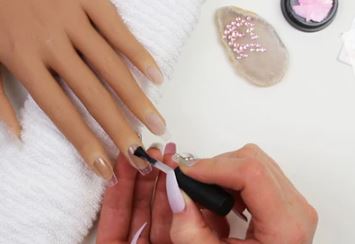
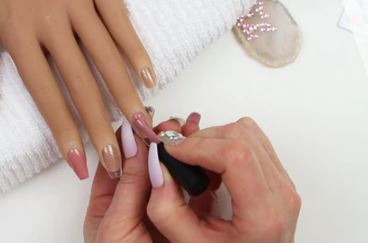
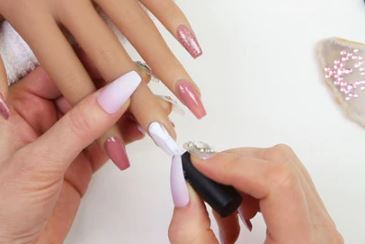
Step 4:
Apply two coats of pink gel polish to all of the nails except the middle finger. Cure in between coats. Use a small liner brush to get the cuticle area perfect so that it looks professional.
Step 5:
Apply one coat of pink sparkle polish, or your favorite pink nail polish to the thumb and little finger. Cure.
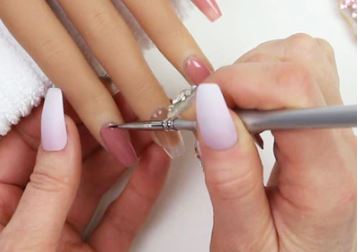
Step 6:
Apply two coats of opaque white gel polish to the middle finger. Cure in between coats. Use a small liner brush to get the cuticle area lines perfect.
You can also use white nail polish. You will just have to adapt this tutorial using regular polishes instead of gel.
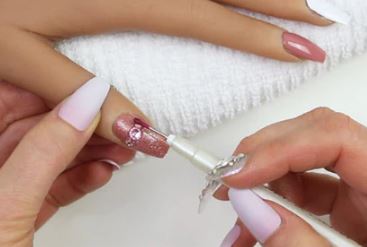
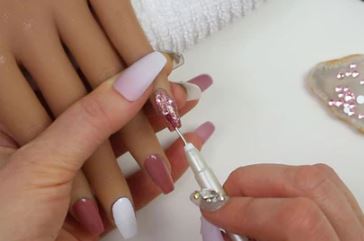
Step 7:
Add nail glue to the thumb and apply pink rhinestones in a line. Start by adding a large rhinestone to the middle and then go outward, adding smaller rhinestones onto the edges.
Step 8:
Add nail glue to the little finger and apply pink sequins here and there. Add about 5 – 7 sequins and keep in mind that odd numbers of things look better grouped together for this type of nail art.
Step 9:
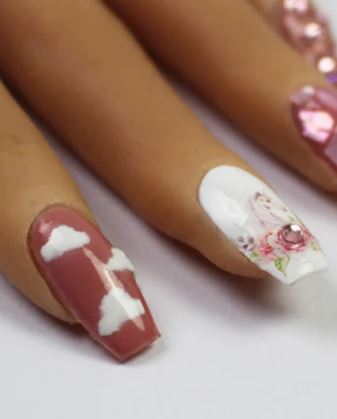
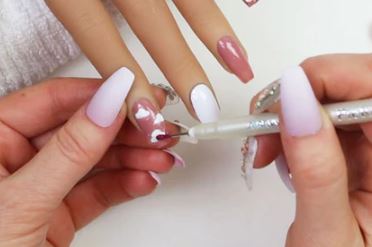
Add cloud stickers to the index finger. You can use waterslide stickers for this step also or whatever sticker you have on hand that will go with the pink color.
Make sure that the edges of the sticker are not sticking up. You can go over them with a silicone tool.
Step 10:
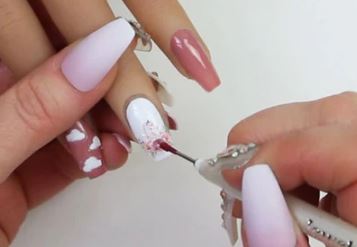
Apply a large unicorn sticker onto the middle finger. If you find that the sticker is too large, you can gently cut off the edges with nail scissors.
Make sure that the edges of the sticker is not sticking up anywhere. You can go over it with a silicone tool to make sure it’s laying nice and flat.
Step 11:
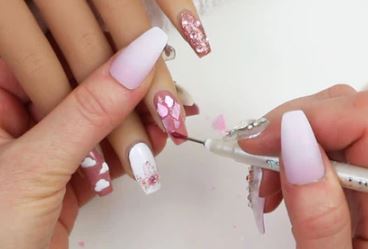
Apply a pink rhinestone onto the unicorn somewhere to give it extra bling. If you want to choose another color, go ahead and make it perfect for you.
Step 12:
Apply nail glue to the ring finger and set pink seashells to fully cover the nail. The set we are using can be broken up really easily.
Step 13:
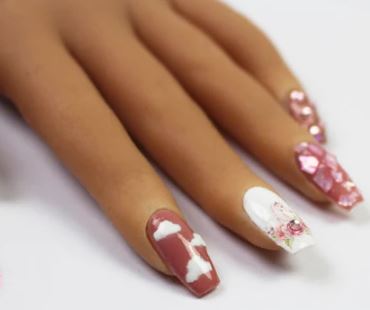
Go over all of the nails with a final top coat of gel polish or builder gel. Pay attention to getting the gel over the gems and sequins so that they don’t fall off.
Make sure you cure for at least 1 minute, or follow the brand’s top coat instructions.

Unicorn Nail Art Supplies
Purchase these unicorn nail art supplies through our affiliate links. We used Maky Nail supplies from Etsy and Amazon.
Pink Rhinestones, Cloud Stickers, Unicorn Stickers, Pink Seashells all came from Maky Nail on Etsy
Pink & Pink Sparkle Gel Polish by Modelones
Did you have fun making this unicorn nail art? We hope so!
Thanks for reading and being here with us today!
If you would like to support our nail blog, we would love it if you could share this article on your social media or link back to this article from your own blogs and websites. We would really appreciate that so very much 🙂
More Nail Articles You Might Love